I originally wrote this blog post as a guest feature for Dovetailed London, as I’m one of their brand ambassadors. I received the fabric in exchange for the blog post.
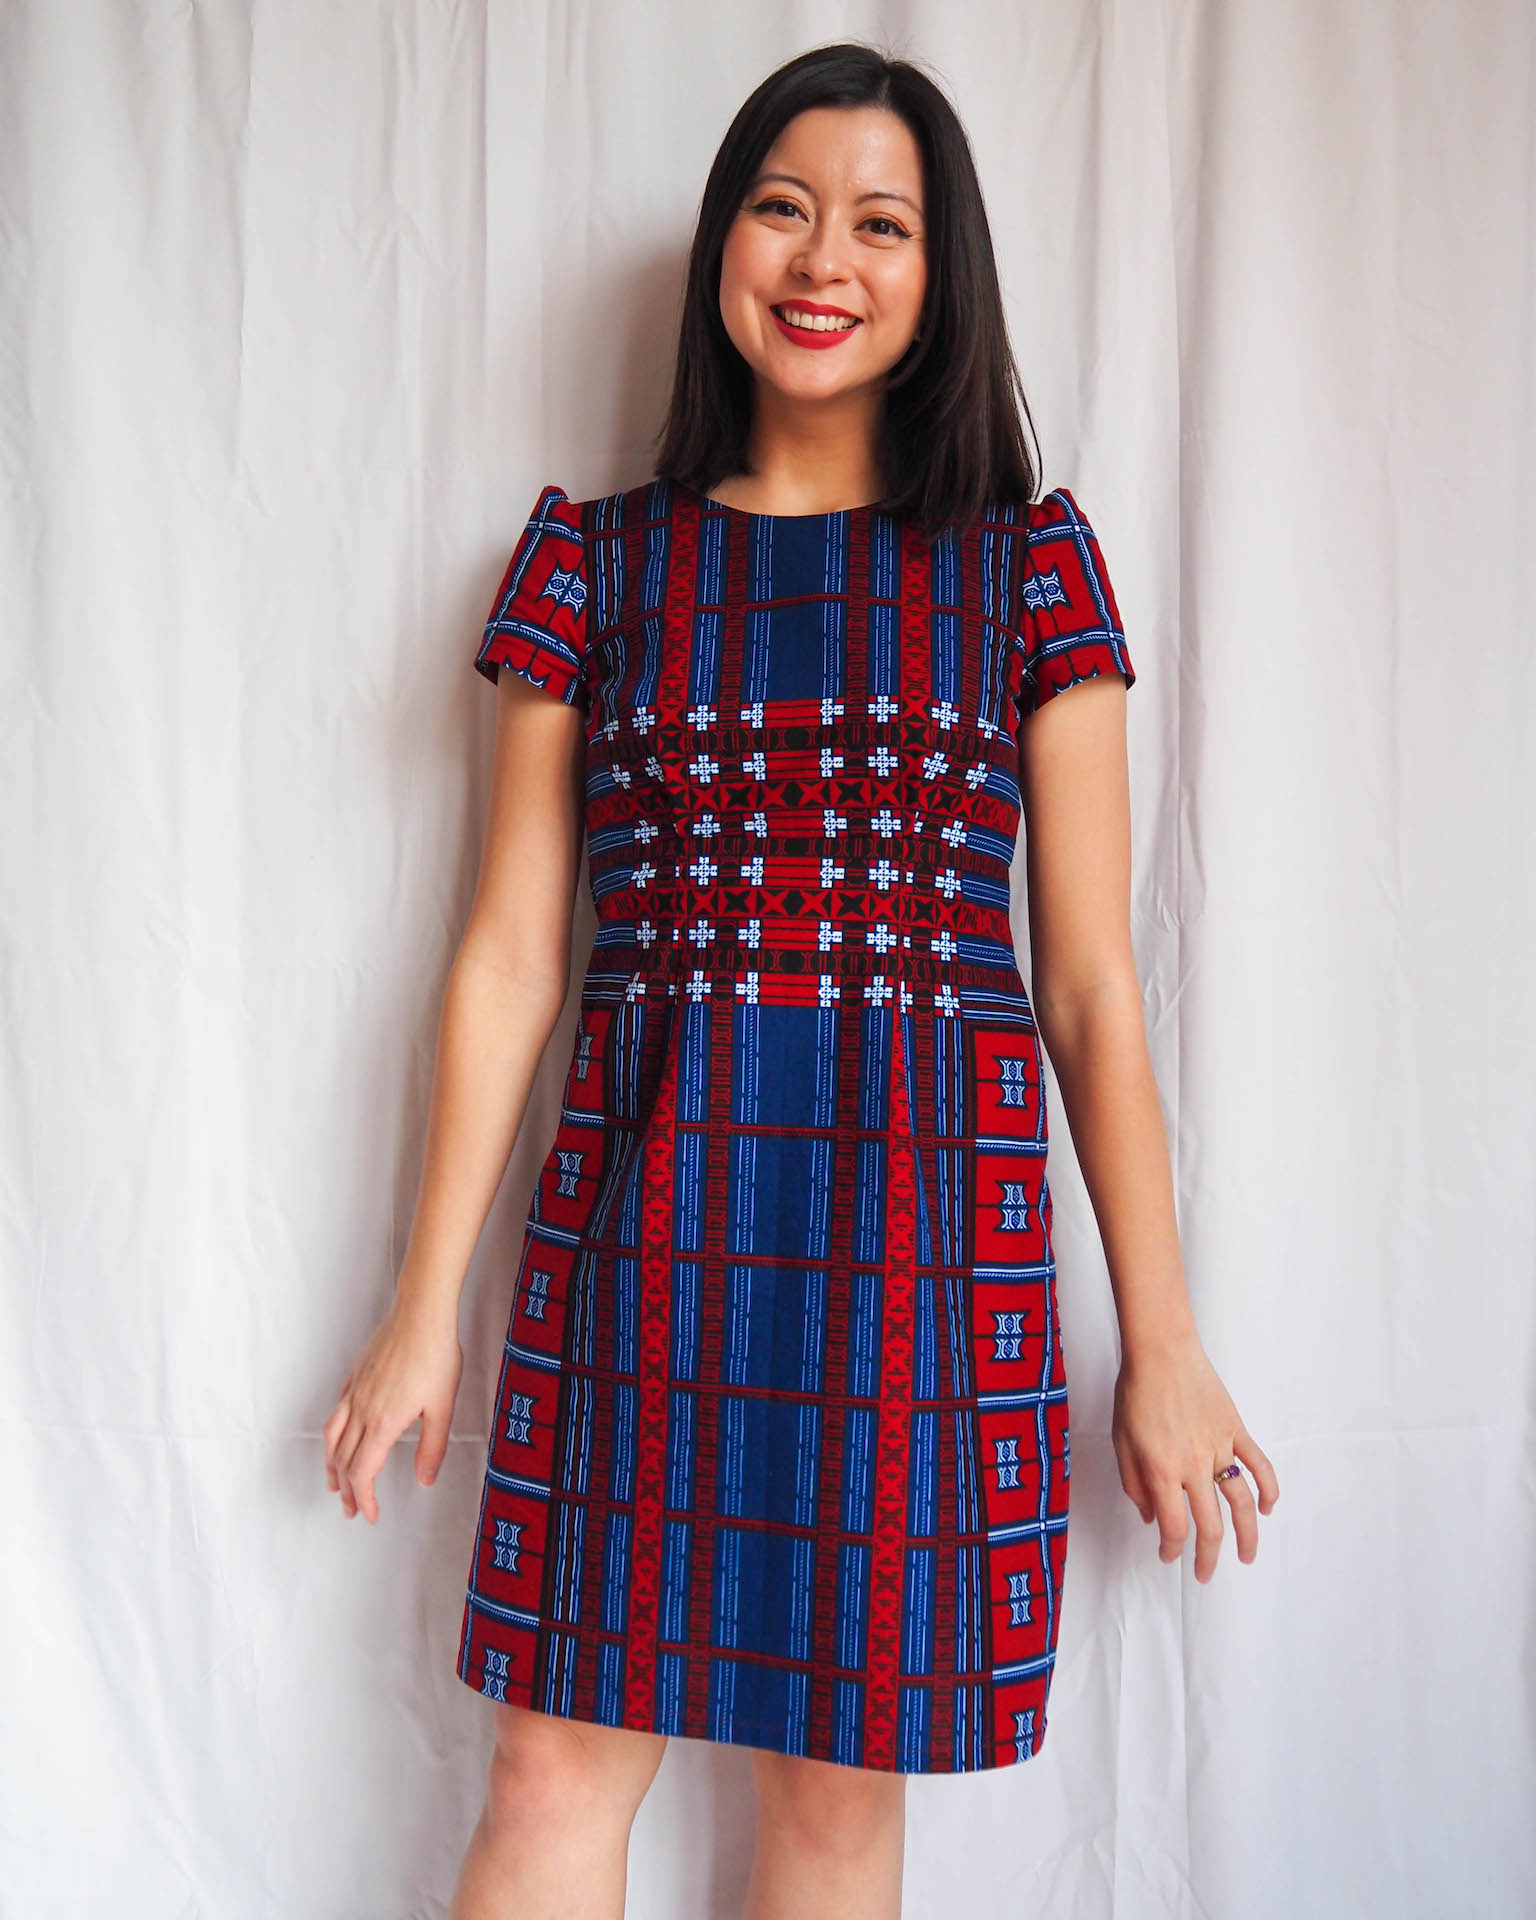
It’s my first Dovetailed London Ambassador make! To sew this dress, I used the Megan pattern from the book Love at First Stitch by Tilly and the Buttons.


I chose this dress pattern because it has clean, simple style lines, which let the fabric be the star of the show. It also has a lot of straight seams which makes pattern matching much easier! The pattern also recommends fabrics with a little bit of structure to their drape, and even suggests quilting cotton – so I knew it would work nicely in wax print, which has a little bit of sturdiness to it.
I had loads of fun playing with the contrasting motifs in this fabric. It’s actually mainly a red fabric, with the red check forming the bulk of the design. The blue stripes and white grid make up a border that occurs less frequently. I decided to use that border as a defining feature of my dress by placing it along the centre front, centre back, and waistline. And I love the effect this creates. It almost looks like I’m wearing a corset on top of the dress!


That’s actually one of my favourite things about African wax print fabric. It often has multiple design features along the length that you can get really creative with. I could make this same dress again out of the same fabric, but centre it on the red area instead of the blue, and the two dresses would look very different. Sisters, not twins.
I pulled out all the tricks to make sure my stripes lined up. I mirrored the pieces while cutting to make sure they were exactly even, I pinned like crazy, I transferred the stripes to the zipper. The process was actually far easier than I expected, largely due to the fabric itself. The grid lines create very useful guides, and the fabric is so stable that it allows for plenty of accuracy when cutting and sewing. I didn’t get all the pattern matching perfect, so don’t look too closely – but I’m very happy with how it turned out.


Wax print can take a bit of a beating too! I didn’t make a toile for this dress, so I did my fitting as I went along. There was a moment of panic after I sewed the neck facing, only to realise that I needed to take a whopping 5cm out of the back neckline. I ended up unpicking the facing, which was already trimmed and understitched, in order to make my adjustment at the shoulder seam. I then cut a new facing and sewed it in place with a 2mm seam allowance. The smallest seam allowance I’ve ever used! And the fabric was an absolute angel throughout. Despite all that manhandling, unpicking and restitching curved seams, it didn’t fray or stretch out, and the neckline looks really neat now. Thank goodness!
All in all, I love my new dress. It’s comfortable and wearable, and I’m kinda thinking about making that sister dress in red now…


